Security
User Identity
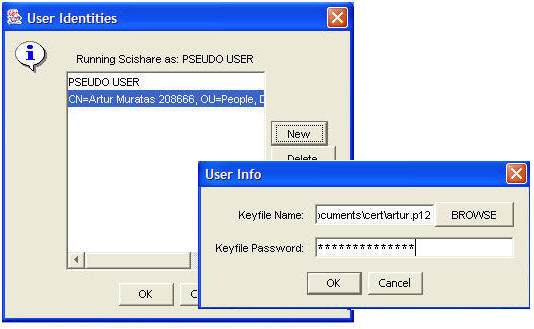
When the user starts the application for the first time, Scishare will use the default settings that identifies the user called PSEUDO USER. Pseudo users are provided with automatically generated X.509 certificates and have access to public resources. However, these peers cannot be granted higher levels of trust in the system. Even though the application runs in a secure state where the user can use and create policies to protect the metadata and data and communicate with other peers through TLS, it is highly recommended that the user should use their own p12 file to login. The advantage of this, is that the user has more privileges to access resources (metadata and data) from other users running scishare. When managing "User Identity", the user has the following options:
- Create new user identity - To create a new user identity the user clicks on "New" and a dialog will pop up asking the user to enter his p12 file and the password for that file. If "OK" button is clicked, then the selected user identity will be used to identify the user in communication with other users.
- Delete user identity - To delete a user identity from the list of user identities the user selects the user identity and clicks on "Delete" button.
- View user identity - To view a selected user identity, the user clicks on "View" button. The result will be another pane that displays the information contained in the certificate issued for this user.
Password Manager
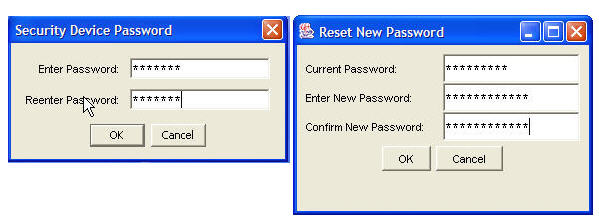
This is a standard dialog window that allows the user to change the security device password. This is the password that the user enters each time the application starts. Here are two dialogs where the password is created for the first time and changing it after:
Manage CAs
This allows the user to add, delete, and view certificate
authorities from the list of CAs that
is availbale. By adding a CA to this list,
the user in fact has created a trusted list of all the users who have this CA. As a result, they all
will have access to the resources that have TRUSTED policy protection. The user
can also delete or view a selected CAs.
Managing the CAs can be done through Security or
when the application starts for the first time and the user has the following
options when calling "CAInfo Manager" dialog window:
- Add new CA - To add a new the user clicks on "New" button which creates URL Panel dialog that allow user to retrieve CAs.
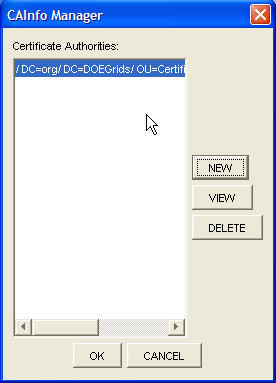
- Delete a CA - To delete a selected CA, the user clicks on "Delete" button.
- View a CA - To view a selected CA, the user clicks on "View" button. This action will pop up another panel showing the information regarding to this CA.
Manage Policies
In order to protect the resources the user creates policies and map them to the resources. The policies are editable, where the user can add or delete groups and rejected users. By default the application provides three policies which are not editable and can not be removed:
- PUBLIC - If the user maps this policy to a resource, then anybody running Scishare will have access to this resource.
- PRIVATE - If the user maps this policy to a resource, then nobody will have access to this resource.
- TRUSTED - If the user maps this policy to a resource, then only the users who have their CAs matching the list of trusted CAs will have access to this resource.
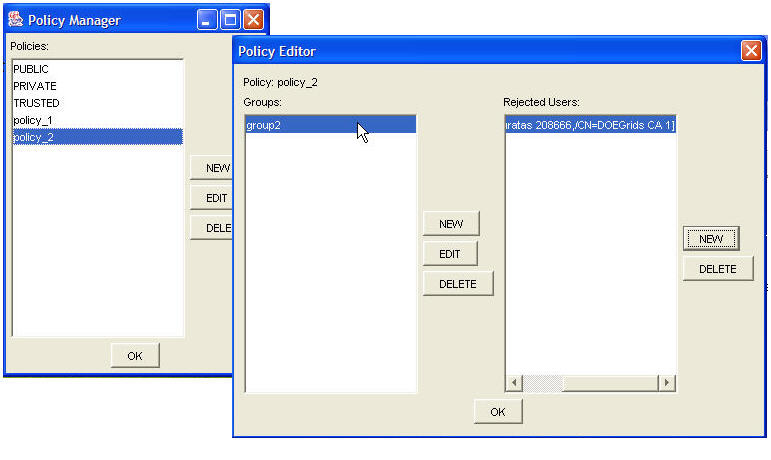
User manages the policies through the Security - Manage Policies,, adding items to database, and editing items. The policy manager represented by "Policy Manager" pane allows the user to do the following:
- Create policy - User clicks on "New" button shown on "Policy Manager" pane and then A dialog pops up asking the user to enter the name of the policy and then clicks on "OK" button. The new policy will be added to the list of existing policies.
- Edit policy - To edit a selected policy, user clicks on "Edit" button and then the "Policy Editor" dialog pops up allowing the user to manage the groups and rejected users.
- Delete policy - To delete a policy, user selects the policy and then clicks on "Delete" button. If the selected policy has been assigned to some resources, then dialog showing the list of resources protected by this policy, will ask the user to confirm removing this policy.
Manage Groups
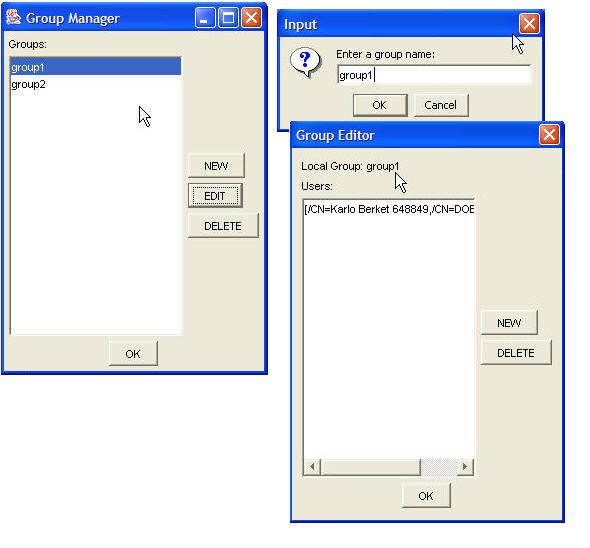
A group is a collection of users, but it also can be empty. In general, the user creates a group and makes it available to any existing or new policy. Managing the groups consists on the following:
- Create a new group - To create a new Group, the user clicks on "New" button which pops up another dialog asking the user to enter the name of the new group.
- Edit a group - Editing a group has to do with adding or deleting users from this group. The user can edit a selected group by clicking on "Edit" button. This will create a "Group Editor" dialog showing a list of users belonging to this group where the user can add a new user or delete a selected user. If the user clicks on "New" button, this will pop up a dialog "User Panel" where the user can search for new users. This dialog gives the user option to narrow the search based on the Name of the new user and/or a CA name for a new user. If user clicks on "Search" button, then this will take the user to "URL Panel" dialog. After the user selects the user from the list of users retrieved from LDAP , clicking "OK" button on previous dialogs will add the selected user in the selected group.
- Delete a group - To delete a group, the user selects the group and clicks on "Delete" button.
Scishare allows the user to manage the groups independently,
by just selecting "Manage Groups" subitem from "Security"
item menu, or through the managing
policies.
